Saturday, January 29, 2000

Kirk's Spoon Fly

Originator: Kirk Dietrich

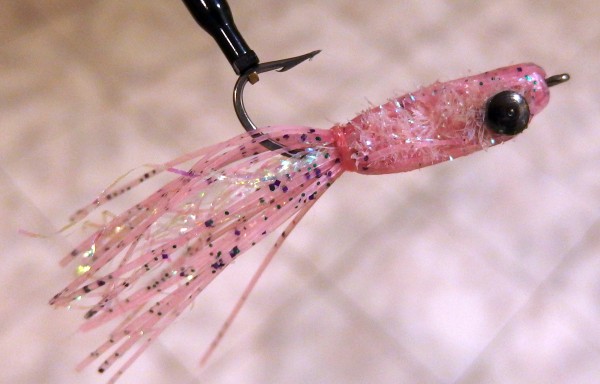
Species: redfish, drum, sheepshead, bass

Remarks:

The most popular redfish flies of all time are the spoon flies. These originated with Cave's Wobbler in the early 80s. Jon Cave of Florida intended to combine the flash and action of the baitcaster's spoon with the lifelike imitation of a traditional shrimp fly pattern. Despite it's effectiveness on redfish, purists decried the Wobbler as heresy!

Kirk Dietrich of Louisiana discovered that by retaining the mylar body and eliminating all other features, the spoon fly was easier to cast and had more action. Over the last decade, tiers have searched for every possible means to make spoon flies easier to make. If the purists had a fit over Cave's Wobbler, imagine what they think about aluminum drink can metal cut to a teardrop shape and epoxied to a hook. Or, plastic fingernails superglued to a hook and covered with glittered enamel.

Despite all it's permutations, the mylar versions remain tops. They are flashier and more durable. Not to mention more aesthetic. Kirk's variety is a "wobbler", that is, the fly wobbles side-to-side when stripping. A few wraps of lead wire under the mylar and at the end of the shank insure the hook remains up. For the grass-filled shallow brackish ponds near Delacroix, Myrtle Grove, Golden Meadow, Chauvin, Dularge, and Hackberry, Kirk's Spoon is a must-have!

For more about Kirk Dietrich and his flies, check out his bio at the Fly Tying World web site.


Video:

Kirk has put together four (4) videos on tying his spoon flies. These cover the basics, as well as possible enhancments to this pattern.  He also details his thoughts on why certain techniques are more effective.  Here's the link to the first video:

https://www.youtube.com/watch?reload=9&v=FexkMwWC5Ag

Materials:

- Mustad 34007 stainless hook, size 2.
- 3/8" mylar tubing.
- lead wire size 20 gauge
- red thread
- 5 minute epoxy
- 30 minute (2 ton) transparent epoxy
- Best colors for mylar: gold, flashabou (gold/pearl), green, silver, root beer.

Instructions:

  1. Using a pair of pliers, make a series of slight bends in the hook until it assumes a somewhat "caddis" shape. 
  2. Wrap thread base from eye back to halfway down bend of hook. 
  3. Make 6 to 8 wraps of lead wire at end of shank and trim off. 
  4. Cut 1 1/2" section of mylar and slide down shank from front until any unraveled endings are past thread. 
  5. Secure mylar at bend with thread and knot off with a whip finish.
  6. Mix together a tiny amount of 5 minute epoxy. Using a toothpick, dab some epoxy into the mylar. Make sure to cover as much surface as possible, and especially towards the back. You now have about 3 minutes to work with. 
  7. Place thread over mylar about 1/8" down from the hook eye, and make 3 to 4 tight wraps. 
  8. With rough pair of scissors, trim off excess mylar covering the hook eye, then wrap thread over end of mylar to form head. 
  9. By now, the 5 minute epoxy should be ready. Don on pair of rubber gloves, then press mylar flat. Keep working the mylar as the epoxy begins to set. 
  10. After the mylar is nice and flat, take the hook out and slip your thumb under the hook point and press. This creates the concave feature that gives the fly its wobble. Allow to set further.
  11. Later, using a brush, apply 30 minute epoxy to the outside of the fly to make it waterproof, durable, and shiny. 
  12. For best results, leave the fly exposed to sunlight for about 24 hours.

Friday, January 28, 2000

Foam Popping Bug

Originator: Ubiqitous

Version by: Randy Leonpacher

Species: bluegill

Remarks by Randy Leonpacher:

Nothing is more fun than catching brimskis on popping bugs. There are so many bugs around water in Louisiana, that you'd better have a full tank of windshield fluid anytime you drive after dark. For this reason, the best time to use popping bugs is the last two hours before twilight. These bugs are easy and cheap to make. Which is good, because so many will get hung up in the willow and cypress trees. It's not that you can't get your bugs out of these trees, it's just that you may have to fend off wasps to do so. Personally, I'd rather donate the fly to the tree.

Materials:

- Mustad 9672 or popper hook, size 8 or 10.
- flip flop foam.
- rubber leg material.
- narrow brass tubing.
- hackle feathers.

Instructions:

  1. Use the narrow brass tubing to "drill" out a cylinder of flip flop foam. A mult-colored, layered flip flop can produced several different color patterns from a single drill.
  2. Each flip flop section is then fastened to a hook by making an incision, putting the hook shank into the incision, and securing with super glue.
  3. Rubber legs are passed thru the body
  4. Feathers are tied, with one palmered behind the body for a tail. 
  5. Eyes can be painted on with permanent markers or nail polish
  6. Use a clear lacquer to coat the body for shine and durability. 
Other:

Thursday, January 27, 2000

Sanibel Special

Originator: Catch Cormier

Species: ladyfish, redfish, Florida snook

Remarks:


The Sanibel Special combines elements of a rattle rouser, charlie, and several popular Florida snook flies which are usually monotonic white. While it's a proven killer for snook, especially under lights, the Special has been very special for Lake Ponchartrain ladyfish. It also works equally well for reds along pipes or dropoffs in deadend canals during winter months.

Materials:
  • Mustad 34007 stainless hook, size 2.
  • 1/100 oz Brite Eyes (non-lead) hourglass eyes.
  • 3/8" pearlescent mylar tubing.
  •  glass rattles 16mm long
  • white thread
  • color substitutions for mylar: silver, gold, flashabou (gold/pearl).

Instructions:
  1. Wrap thread toward bend of hook. 
  2. Cut two sections of mylar, each 1 1/2" long. Lay one section of mylar along top of hook. This will create the mylar body and tail. 
  3. Secure the mylar at the bend of hook, then knot off (whip finish preferred). 
  4. Slide glass rattle into mylar, then secure the front end of the mylar with thread (sealing off the rattle. 
  5. Next, tie in the eyes. 
  6. Flip hook over, and lay the second section of mylar on bottom of hook. This will create the mylar wing. Make sure the ends of both mylar sections are even. 
  7. Tie off the wing section in front of eyes, and finish the head with a whip finish. 
  8. Apply a couple of drops of head cement to the lower half (near the eye) of the mylar wing. Pinch the mylar momentarily so the cement locks into the mylar. This will keep the lower end from unraveling. 
  9. Next, unravel the upper end of the wing, and also the tail. 
  10. Finally, take a fine brush and apply 30 minute (2 Ton) transparent epoxy to the body and head.
Other:

Like all epoxy flies, this is best done as a batch. While UV resin yields acceptable results, it doesn't have the same endurance as 30-minute clear epoxy.  The Devcon 2-Ton variety coats on clear and remains clear.

Wednesday, January 26, 2000

Tom Nixon Spinner

Originator: Tom Nixon

Version by: Tom Nixon

Species: bass, sunfish, crappie, white bass, pickeral

Remarks:

In his landmark book, "Fly Tying and Fly Fishing for Bass and Panfish", warmwater fly fishing legend Tom Nixon of Lake Charles, LA, details numerous patterns that utilize spinners, and goes into great detail about the different types of blades and their action. Purists may be offended, but spinners on flies is part of the warmwater tradition. "They catch fish", Nixon says, "because of how much action they give with little or no forward motion. The oscillation transmits flashing 'here i am' signals to any and all nearby creatures".

There are two types of spinner flies: inline and offset. The inline flies are easier to cast with light rods and tied on sizes 6-8 can catch a wide variety of fish. While his Mickey Brim and Feather Duster are classics of their own, this particular pattern emerged in recent years, and has been an absolute killer on bass and crappie. Whatever name Tom gave it has been obsoleted, such a great fly deserves the name of the master who created it!

Materials:

- 6 gauge stainless steel or bright music wire
- #14 brass barrel swivels
- light weight beads 1/8" in diameter in various colors
- #3 or #4 Indiana spinner blade
- size 6 or 8 Mustad #3366 hook or equal
- chartreuse, white, or black yarn for body
- copper wire for ribbing
- calf tail or soft hackle in color coordinated to yarn

Instructions:

1) Cut a section of wire about 3 inches, you need only about half of that, the rest makes it easier to work with.
2) Tie the feather or calf tail on the hook as normal.
3) Fasten the hook to the wire shaft by forming an eye on the wire. Cinch off the eye with three turns of wire, then trim.
4) Tie in thread on the harness wire, tie in the copper wire. Tie in yarn or begin dubbing at the end of the wire near the hook.
5) Bring the yarn or dubbing forward up about an inch, then spiral the copper wire forward to that point. Tie off the yarn and copper wire, and secure with knot.
6) slide 3 beads down the wire, then the spinner, then a single bead.
7) Create an eye on the last segment of the harness wire, by doubling back and wrapping around the shaft 3 times, then trimming. Make sure you leave enough room on the shaft for the beads to slide a little.
8) Go fishing.

Other:

Tom Nixon's book has been out of print for over a decade. However a copy occasionally pops up on eBay. It's not just instructional on tying and fishing, the book is chocked full of great stories you'll want to read over and over again!


Tuesday, January 25, 2000

Kathy's Golden Spider

Originator: Derrell Nantze

Version by: Derrell Nantze

Species: Trout, bream

Remarks by Derrell Nantze:

This is a knockoff of the Brown Spider nymph, just faster and easier to tie. I use 100% Rayon knitting yarn for the body, but floss could be substituted - it's just harder to work with. The yarn undergoes a translucsent color change when wet.

Materials:

Hook: #14, 12 or 10 Standard nymph hook
Thread: #8/0 dark brown uni-thread
Body: Gold #4 knitting yarn 100%Rayon (I like Mira by UTK)
Wing: Guinea
Tail: Wood duck flank
Rib: fine copper wire

Instructions:

Start thread and wrap lead weight
Attach tail (body length),rib and yarn at rear of hook
Wrap and tie off body, leaving 1 eyelet gap for head
Wrap and tie off rib
Attach Guinea wing
Build head and whip finish

Monday, January 24, 2000

Kathy's Silver Minnow

Originator: Derrell Nantze

Version by: Derrell Nantze

Species: Bream, crappie

Remarks by Derrell Nantze:

Fished as a nymph under an indicator, this pattern can draw vicious attacks around lily pads and cypress trees. I use 100% Rayon knitting yarn for the body, but floss could be substituted - it's just harder to work with. The yarn undergoes a translucsent color change when wet.

Materials:

Hook: #14, 12 or 10 Standard nymph hook
Thread: #8/0 Red unithread
Body: Silver #4 knitting yarn 100%Rayon (I like Mira by UTK)
Wing: Guinea
Tail: Pearl Krystal Flash
Rib: Pearlescent tinsel or fine wire
Weight: 8 or so wraps of lead, .15 or .20

Instructions:

Start thread and wrap lead weight
Attach tail (body length),rib and yarn at rear of hook
Wrap and tie off body, leaving 1 1/2 eyelet gap for head
Wrap and tie off rib
Attach Guinea wing
Build up red head and whip finish

Quick and easy!

Sunday, January 23, 2000

Cap Spider

Originator: Mike Verduin

Version by: Mike Verduin

Species: bream, crappie

Remarks:

The name of Mike's fly comes from his first encounter with a crappie jig similiar to the fly. He saw several of these mounted on the cap of another angler during a fishing contest. He was so impressed with the lure that he modified it to make it "fly friendly".

Fish the fly with a long leader, or if necessary, with a sink tip connector. Make tiny strips to drag it along the bottom, then hold on because whatever eats it usually isn't small. Because the jig head allows the hook to ride up, it's one of the best flies ever created for fishing bottom nesters, like redears and oscars.

Incidently, that's Mike himself with a one-pound redear caught at Lake Concordia using the "Cap".

Materials:

Hook: 1/100 or 1/124 ounce jig hook. A few come painted black, otherwise use black nail polish.
Legs: Barred Sillilegs or rubber legs
Body: Vernille or ultra chenille in chartreuse, black, olive, or your favorite color
Thread: using a flat waxed thread will lock the legs better than 6/0 thread

Instructions:

1. Wrap the hook shank with thread and wrap the vernille around the hook shank. Tie the vernille off at the head.
2. Attach four or six short sections of silli or rubber legs behind the head. Use a figure 8 wraps between the legs to spread them out.
3. Whip finish and cement.


Saturday, January 22, 2000

Foil Pencil Popper

Originator: Walt Holman

Variation: Paul Barnett

Species: saltwater and warmwater

Remarks:

The foil popper was popularized by Walt Holman of Alabama. Over the years, variations by Jim Freres of Texas, and Kirk Dietrich and Paul Barnett of Louisiana, have been showcased at Federation of Fly Fishers events and other fly tying exhibitions. When a foil balsa popper is constructed to fine detail, it ranks as one of the most beautiful flies to behold. Little wonder that so many end up in shadow boxes.

Fortunately, fish don't care how good your pencil poppers look. So no matter how imperfect they seem, give 'em a try. Bass, specks, pickeral, redfish, ladyfish ... all love poppers. For freshwater, use the bronze 9674 hook. For saltwater, the popular hook used to be the Mustad 9674B stainless before it was discontinued. Any 4X stainless hook should work.

Materials:

- Mustad 34011 stainless hook, size 2.
- white fishhair
- chartreuse fishhair
- green fishhair
- white chenille
- peacock or holographic crystal flash
- peel off, prismatic eyes
- 40 lb. monofilament or V-rib or larva-lace
- 20 gauge lead wire
- red thread
- white thread

Instructions (courtesy of Paul Barnett):

1. Cut 5/16" OD Balsa Plug. Use 5/16" I.D. thin wall brass tubing (sharpened edges) chucked in drill press or drill to cut plugs from balsa blocks.

2. Taper plug in pencil sharpener. Turn crank approx. 3 turns forward and 3 turns backwards – backward turns smooth cut out.

3. Cut slot for hook and cut angle on front using hacksaw blade. The hook I use most often is the Mustad 9674. #1 hook = 1 9/16" OAL. #2 hook = 1 5/16" OAL. #4 hook = 1 1/8" OAL.

4. Sand cup in face of plug. Face can be also be left flat or cut at a downward (opposite) angle to make a diving plug.

5. Glue in hook and filler. Use Devcon 2 ton epoxy for glue filler. A 1/16" x 1/8" balsa strip serves best as filler.

6. Cut excess of filler and sand taper on rear. 240-280 grit sand paper works best.

7. Glue on foil with rubber cement and roll knurled punch over body for scale look. Punch with a 1/4" or 5/16" OD knurled finish works best.

8. Pain back, cup, and eyes. Use a sponge or eyebrush with black or dark paint to create a top finish. Use an orange or red paint for the cup face and gills. Use 3 different size dowels to paint the eyes. A red-white-black eye pattern is most used. The best paint for this job is acrylic enamel (easy to work with and binds to the epoxy finish).

9. Tie on tail and coat with Devcon 2 ton epoxy. Thin epoxy approx. 20% with acetone & add ultra fine glitter for a great look. Rotate poppers until epoxy is dry enough not to sag – usually 1 to 2 hours depending on how much acetone was added.

Balsa blocks, balsa strips, brass tubing, rubber cement – all can be found at Hobby Lobby or Hobby Town. Your local hardware store, Home Depot, Lowes, Sears – you can find hacksaw blades, knurled punches, Devcon epoxy. For colored foil, the best type is that used for baking potatoes.

Alternative to drill press: a 2" brass tubing with a hole at the top for an allen wrench. The tubing is twisted into the balsa – make sure the plug is with the grain of the wood! The pencil you see is used to push the plug out the tubing. The foil in the case has been pre-cut to sizes for a size 1 popper. Making foil poppers is not time consuming …if you utilize an assembly line approach!

Friday, January 21, 2000

Rosborough Hares Ear

Originator: James Ogden

Version: Polly Rosborough

Species: freshwater

Remarks by Catch Cormier:

The original Hares Ear is one of the oldest flies known, attributed to 19th century English tier James Odgen, but likely many decades older. This version of the classic nymph was by Polly Rosborough, author of the book "The Fuzzy Nymphs".  Rosborough was a proponent of flies that are suggestive in nature and which have a soft, buggy profile that displays motion even in still waters.

I saw this fly - minus the beadhead - tied by Rosborough at the 1993 Federation of Fly Fishers National Conclave in Livingston, Montana.  In addition to being the first to add a "gold rib" to the hare's ear fly, Rosborough used a dubbing loop of fibers from the mask of the rabbit to make an especially buggy thorax.  I later added a bead head, which at the time, was still fairly new to flies here in America.  It eliminated the need for adding lead wire to give weight.  The fibers of the tail, along with the spun fibers of the thorax, add subtle motion to this fly that is especially effective in enticing fish. While it's a great trout fly, it's even better for redear sunfish (chiquapin), bluegill, and Rio Grande Perch.  

Materials:

  •  Hook: 2XL nymph, size 14
  •  Bead: small (5/64)
  •  Thread: size 6/0 or 70 denier
  •  Tail: Hare's Mask, short hairs found on the lower ear
  •  Abdomen: Mixture of hare's mask fur and antron
  •  Ribbing: small copper wire
  •  Thorax: Longer hare's mask fibers found on sides of face
  •  Wing Case: 4 strands of turkey fibers

Instructions:

  1. Start with thread base, then tie in bead head building up a thread ball behind the bead to secure it in place.
  2. Tie in tail fibers
  3. Tie in copper wire
  4. Get several clumps of hares mask and antron and blend it together with your fingers. Touch the fibers to the waxed thread and form a noodle of dubbing. Wrap the dubbing toward the hook bend. Then wrap thread back toward the eye.
  5. Spiral the copper wire thru the abdomen by wrapping opposite the dubbing wraps.
  6. Cut off turkey feather section. Bind in at thorax going towards tail.
  7. Form a dubbing loop at rear end of the thorax about 3-4" long and add long fibers. Tighten the dubbing loop by spinning with a dubbing spinner or with an electrical test clip. When tightened, palmer the loop around the thorax area.
  8. Once the thorax is formed, pull the turkey wing fibers forward and bind down with thread behind bead head. Then whip finish.
  9. Take a small brush and gently abrade the bottom and sides of the thorax to give the fly a buggy appearance.


Tuesday, January 18, 2000

SR71 Woolybugger

Originator: Russ Blessing

Version by Catch Cormier

Species: all freshwater gamefish

Remarks:

The famous SR71 spy plane was the inspiration for this version of the popular woolybugger. Like the sleek jet with swept back wings, codename "Blackbird", the SR71WB has flow back design. Using shlapplen instead of saddle hackle for the palmered collar accomplishes this. What's more, the webby nature of this particular feather gives it more bulk than the average WB. As it is stripped, both the collar and tail pulsate generating an enticement that no trout, panfish or even bass can resist.

I can't take full credit for this fly. Merv Herbert heard about it on Art Bell's radio show, when a caller mentioned that flies were being tied in a secret Nevada base using instructions found in the saucer that crashed in Roswell in 1947. Made sense to me.

Materials:
- 0.20 lead wire
- olive medium chenille
- olive schallpen hackle
- size 12 Mustad 9672 hook
- olive marabou
- pearl crystal flash

Instructions:

- tied thread on hook to bend, do 8 wraps of lead wire around shank.
- measure marabou (with tips out) equal to shank of hook, tie down at bend, snip marabou even with front of wire wrap, use thread to secure excess against shank.
- trim 1/2 inch off tip of schallpen, tie in tip at bend.
- trim off 1/8 inch of chenille fur off its string, and tie the string in at bend.
- bring thread to 1 "eye length" from eye of hook.
- wrap chenille forward each wrap snug in front of the previous wrap to 2 "eyes length" away from the hook eye.
- palmer (wide loose wraps) the feather toward the eye, make 2 turns in place 1 "eye length", then secure with 2 wraps of thread right thru the spiraled-out fibers.
- stroke the fibers back and build a head of thread and secure with half-hitch or whip finish knot.

Now here comes the fun part. To really get the fibers to lock back, take saliva and use it to wet the "wings" and stroke them back. When dry, the fly will retain it's sweptback shape.

Sunday, January 16, 2000

Coma Cockaho

Originator: Catch Cormier

Species: speckled trout, smallmouth

Remarks:


The plastic H&H Cockaho Minnow is a favorite lure among speckled trout enthusiasts in the lower Barataria and Terrebonne Parish bays. The Coma Cockaho was created to match that plastic lure - it's a "full body" fly that has incredible flash and tail action.

It has been especially effective in the Fall months over reefs and in deadend canals across the Louisiana coast. Since 2006, it's also been used for smallmouth bass and in some cases, crappie, with fine results! 

Best overbody-tail and body colors are chartreuse / chartreuse (green water), sand-orange / pearl, and pink / pink. In winter or heavy overcast days, purple / purple works well.

Materials:

  •  Mustad 34011 stainless hook, size 1.
  •  1/50 oz lead dumbell eyes, or equivalent.
  •  medium ice or estaz chenille.
  •  mylar tubing, pearl small
  •  Silli-legs.
  •  thread to match body or overbody color


Preparation:

Silli-legs usually come in segments with 1/4" solid at both ends and strips in the middle.  Fold the segment in half evenly and cut in half.  Each half will make one fly.

Also, cut a section of mylar tubing the length of the hook and remove the filler.

Instructions:

  1. Tie in eyes about 1/4" from eye of hook.
  2. Wrap thread toward bend of hook and stop above the barb.
  3.  Tie in one end of the mylar tubing (tubing facing back).
  4.  Secure estaz, then wrap thread back to just in front of the eyes. Wrap the estaz around the hook toward the eyes. Loop each wrap just in front of the previous wrap. Make one wrap in front of eyes, then secure with one wrap of thread.
  5.  Tie in the solid end of the Silli-Legs just in front of eyes.
  6.  Wrap the estaz over the secured piece of sillilegs, then tie off the estaz with a large hand whip finish and cut thread.
  7.  Tie in thread at the end of the Chenille body.
  8.  Divide the legs up into two even sections. Pull one section back over the top of the estaz, stretch it quite a bit, then make 2 wraps of thread over it.
  9.   Pull back the other group of legs under the body, stretch and secure with 2 wraps of thread.
  10.   Now that the tail has been created, knot off the thread with a whip finish.
  11.   Trim the tail back so its as long as the body (about 3 inches on a size 1 hook)
  12.   Apply a light coat of Hard As Nails, or 30 minute (2 Ton) transparent epoxy, or UV epoxy to the sillilegs on top and below the body.  This will prevent them from breaking after several strikes from toothy fish.


Saturday, January 15, 2000

Crystal Shrimp

Originator: Tom Springer

Applications: anything that swims

Remarks:


Along with the Clouser Minnow and Woolybugger, the Crystal Shrimp ranks as one of the most versatile submergent flies in existence. This pattern has caught everything from Oscars and Peacock Bass to reds and redears, and all varieties of bass and coldwater trout. Even baby tarpon, carp and mullet have been known to eat it! It's a killer under lights. If seatrout or snook could talk, oh my, the stories they could tell!

Though there are several flies that bear the name "crystal shrimp", this variation by Tom Springer of Pensacola is not only very simple to tie, but has proven to be the most effective of the shrimp patterns. It's even credited with a 28 pound redfish that once claimed third spot on the Louisiana Outdoor Writers Fly Rod Records List.

Materials:

Hook: size 2-6, Mustad 34006 or similar
Thread: flat wax nylon in white or pearl
Body: small or medium diameter pearl crystal chenille or pearl crystal flash chenille
Antennae: krystal flash fibers
Shellback: krystal flash fibers
Eyes: quarter inch section of 50-pound monofilament, burnt at each end, then crimped in center

Instructions:

1) Tie in the thread base.
2) Tie in the mono eyes towards the back of the hook. Use a dab of super glue to secure in place.
3) Tie in several strands of krystal flash about 3" long at the rear of the hook, with about 1/2 to 1 inch of strands going past the bend of the hook.
4) Double back the remainder of the krystal flash towards the rear of the hook and tie it down so that it points away from the hook eye.
5) Tie in the crystal chenille over where the krystal flash is tied in, then bring the thread back to the hook eye.
6) Make one wrap of the chenille in front of the mono eyes, then proceed to wrap the chenille behind the eyes toward the hook eye. That first wrap helps to seperate the eyes outward. For a good body, always make the wraps tight against each other.
7) Tie off the chenille at the hook eye.
8) Take the long strands of krystal flash that we doubled back, and now extend them over the top of the chenille, and tie in at the hook eye. Some of the flash will extend over the hook eye. Trim so that the fibers extend about 1/8 inch past the hook eye. This will create the shrimp tail.
9) Whip finish and apply cement.


Friday, January 14, 2000

Vertically Oriented Strike Indicator


Originator: Catch Cormier

Species: freshwater, saltwater

Remarks:

The VOSI isn't really a fly, it's a "fly enhancer". Think of it as the flyrodder's popping cork. In some instances, it may be used as a strike indicator for freshwater submergent flies.

The inspiration for the VOSI came from Pete Cooper's Perch Float Popper. The popper is made by cutting a styrofoam perch float in half, making a slit in the half-body, and gluing to a threaded hook. Directions can be found elsewhere on the Flies list.

Circa 1992, a few saltwater fly anglers were using the popper along with a Clouser Minnow or Charlie as a "popper-dropper" rig, where the submergent fly was suspended under the popper by a section of tippet tied to the popper hook. Two problems with this rig: the depth of the dropper couldn't be adjusted without cutting and retying, and the dropper section kept getting tangled in the popper hook.

Instead of using a popper, I simply took the half-a-perch-float-body, drilled out a concave face, and made it into the fly rodder's popping cork.

Since "perch float" lacked respect among some fly anglers, I gave this creation the name "Vertically Oriented Strike Indicator" (VOSI). Besides, unlike a perch float, the VOSI requires the correct leader formulation to insure the proper displacement of the trailing fly and it's action in the water. It's all in the 14 page operations manual.

Seriously, the name refers to the fact that it hinges the leader and fly into a vertical orientation, ie, about 45-90 degrees to a floating fly line. The VOSI sits horizontally in the water, but when a fish strikes, even just a nibble, it bobs into a vertical orientation. If the cork goes under, it's time to set the hook.

For freshwater, the pointed end faces the fly line. A slight twitch is all that's used. In saltwater, when fishing for specks, the concave (wide) end faces the fly line. The plastic pin is inserted into the narrow end to reduce the chance of it falling out. A good twitch of the rod tip causes the VOSI to pop, enticing specks and reds to investigate the fly beneath.

Materials:

Perch floats in either 1 1/2" length or 2" (slightly wide) length. The larger corks are almost always used for saltwater, for choppy conditions, but require a higher weight rod to cast. The smaller floats can be cast with as little as a 3 weight, but a 5 weight is recommended.

A dremel bit tool, conehead sander.

Xacto knife.

Sanding paper, 400 grain is good.

Instructions:

Using a Xacto knife, cut the perch float in half. Most of these floats come with a white end and a red end. If you plan to make Kirk's Perch Float Poppers, save the white end for that purpose (it eliminates having to do a primer coat).

Take the Dremel bit and bore out a cup face in the half-floats. Do this by hand - using the Dremel tool is not safe, and will eat away too much of the styrofoam. If you wish to create a slit, take the Xacto knife and carefully cut lengthwise to the center. Take the sandpaper and pass the edge into the slit, then sand out the slit so it's wide enough to accept your leader.

If water is choppy, then a larger size vosi will work. If you have trouble making the vosi pop in saltwater, then modify the plastic pins. At the wide end of each pin, add a few wraps of lead weight and cover with thread, then epoxy over. This sinks the vosi just enough to make the cupped face "grab" water when stripped.

Thursday, January 13, 2000

Silli Minnow

Originator: Ubitiquous

Version by: Catch Cormier

Species: panfish

Remarks:


This is a fly size version of a popular crappie tube jig. It uses silicone skirt material for the tail. Also known under brand names such as silli-legs, loco-legs, etc., the material most imitates the plastic of tube jigs.

Tube jigs have long been a popular lure for crappie anglers. Often when crappie strike, they attempt to injure the baitfish before eating it. When they strike and feel a pliable material that has "feel" to it, they'll strike again. If not, often they leave it alone. This observation comes from many hours of watching crappie in clear water under lights.

I first saw the original Silli Minnow tied at fly-tying festival in North Carolina in 1999. The tier called it a Tube Jig Fly and described it as a fly-sized version of the popular Tube Jig.  One thing that stood out was that, when cinched down with thread, the silicon strands flared out. It looked nothing like the tail on a tube jig.

Later I figured out a trick. When tying the tails in, wrap tight near the head, but make a few loose wraps above the hook point. Then wrap back to the head. Add a tiny drop of UV epoxy over the loose wraps, then hit with the UV light for a couple seconds.

Another modification I made to the original was replacing the chenille body with Krystal Flash Chenille. This material matches the pearlescent look of a tube jig. After all, with this fly we’re “matching the commie hatch.”

Materials:
Jighead: 1/80 or 1/64 ounce
* alternative: competition jig 2x streamer hook with a tungsten beadhead
Tail:  Sillicon skirt or Silli-Legs
Body:  Ice dub chenille, or medium cactus chenille

Instructions:

1. If using a beadhead, slide the bead up the hook to the eye.
2. Start a thread wrap. Make the thread body rough by wrapping back and forth in a few wide wraps.
3. Tie in a section of skirt tail, about 8 to 10 strands. DO NOT TRIM YET. Also note that the tail will flare if you wrap thread very tightly. If you do not wish it to flare, tie well secured but NOT tight. Then apply a drop of super glue to secure.
4. Tie in a small section of the body material (chenille, etc.) and secure back to just above the barb of the hook. Then take the chenille and wrap around the hook forward to just behind the head (or bead). Tie off the body material and trim material off. Finish with a whip finish or other knot.

Wednesday, January 12, 2000

Fluff Butt

Originator: Ubitiquous

Version by: Mark Hester

Species: panfish

Remarks:


In the 1980s, Mark Hester was tying a fly rod friendly version of the marabou jig popular for crappie fishing. Using a finer chenille, a pinch of marabou tips, and a much lighter jighead (1/100 oz), he referred to this microjig as the Fluff Butt. It's light enough to cast with a 5 weight rod, yet with less material bulk it's also able to sink quickly on light leaders.

An avid crappie angler, Mark also experimented with fishing the Butt under a tiny nymph float (aka, strike indicator) next to submerged structure with great success. However, fishing it "straight", much like stripping in a woolybugger, creates an action that gamefish can't avoid.

In the early 90s, the Fluff Butt was one of the very first flies to be converted into a beadhead fly (thanks to an article on fly beads in a British publication titled Stillwater Trout Angler). The beadhead version doesn't sink nearly as fast. But a fish caught on a beadhead fluff butt can qualify for a Louisiana and IGFA fly rod record, while one caught on the jighead version cannot.


Materials:

Same as you would use to create a woolybugger. In fact, the fluff butt is best described as a bugger minus the hackle, but there are two other key distinctions as well:

1) use fine chenille or vernille instead of regular chenille

2) use fine marabou tips instead of the "wet hackly" ones

Other:
3) size 10 or 12 Mustad 9672 hook
4) bead size to match, or jigheads in 1/80, 1/100, or 1/124 ounces.

Instructions:

If using a beadhead, slide the bead up the hook to the eye. Wrap thread, then tie in a marabou tail. The length of the tail beyond the point where it's tied down should be as long as the hook shank.

Tie in a section of vernille. For best results, lay the vernille atop the hook almost to the bead (or lead head), then tie it in across it's length. If you do this, then as you spiral the tag section of vernille around the hook forward, it will lay even. When you get to the bead (head), cinch the vernille down with several wraps of thread. Then finish off with a whip finish or other knots.

Tuesday, January 11, 2000

Prince of Tides

Originator: Flip Pallot

Species: inshore saltwater

Remarks:


The Prince of Tides is based on the popular bendback design. Like the bendback, it's weedless design keeps it free of grass.

The problem with the conventional bendback in the Louisiana marsh is that the chenille body picks up mud. Then, no matter how much you try and clean the fly, it remains dirty looking. The "Prince" with it's body of either monofilament, larva lace or small V-rib, won't retain the mud and keeps a gleaning appearance that attracts Mr. Redfish.

Materials:
- Mustad 34011 or Tiemco 811s or similar, sizes 2 to 1/0.
- gold or silver vinyl ribbing.
- white bucktail.
- chartreuse or blue bucktail
- pearlescent crystal flash
- thread of same color as overwing bucktail

Instructions:

Make a 45 degree downward bend in the first 1/3 section of the hook shank. This is to form the fly head.

Next tie in the thread and wrap to end of shank. Secure in the vinyl rib. Bring thread back to fly head. Wrap vinyl rib around shank towards fly head. Tie off at fly head.

Turn hook over in vise, and tie in matchstick width of white bucktail, "color" bucktail, and then crystal flash, to form the wing. For added effect, add a few strands of either silver or gold crystal flash (to match body) on each side of the wing where a lateral line might exist.

Then build up the head with thread. Using different size dowels, create the fly eyes by using acrylic paint or nail polish in two or three different colors. Finally, after the eyes have dried, cover the head with clear enamel or two-ton epoxy.

Monday, January 10, 2000

Flasher Fly

Originator: Tom Broderidge

Species: bass, stripers, redfish, seatrout

Remarks:


In 1995, Tom Broderidge of Havana, Florida, wrote the first book on fly fishing the Gulf Coast, appropriately titled "Fly Fishing the Gulf Coast". Tom was a very popular tier and presenter at the FFF conclaves because he often left "conventional" at the door. The Flasher Fly is an example.

The Flasher has a gold braid body and a two-tone wing of bucktail or ultra hair. What makes it unconventional is a small spinner blade attached at the bend of the hook using a monofilament loop. The eyes were originally painted on using varying diameter sizes of dowels, but stick-on eyes are much easier. The eyes are important... like Tom did, I believe predatory fish key on eyes, especially in clear water.

When retrieving the Flasher, I use fast, small strips that allow the blade to rotate freely and away from the hook. However, a friend has caught a variety of species — mostly bass — by stripping in a Flasher and letting it flutter down for a few seconds.

Try both techniques and see which one works best.

Materials:

Hook: Mustad 34007 sizes 2 thru 1/0. This is a stainless hook that allows for fresh or saltwater use.
Body: Gold braid material
Wing: Ultra hair in white/olive, white/blue, or white/purple
Blade: size 2 Colorado blade

Instructions:

1. Wrap a thread base down to above the barb of the hook.
2. Cut 5-6 inches of 20-30 pound mono. Bend in half.
3. Slide the blade down to the bend.
4. Lay the folded mono along the hook, about 1/8 inch back of the hook eye. Check where the blade is. It should be about 1/4 inch past the end of the hook. Trim the folded front end, as needed, until the blade is in the right position.
5. Wrap thread and secure the mono.
6. Tie in a section of gold braid back to above the barb of the hook.
7. Wrap the braid around the hook, slightly overlapping, to an eye length behind the hook eye.
8. At this point, to help keep the braid from "sliding", add Hard As Nails or a thin coat of 2-Ton Epoxy or UV Epoxy along the body.
9. Tie in the lighter color of Ultra Hair at least twice as long as the hook length.
10. Tie in the darker color of Ultra Hair above the lighter color, also 2X the length of the hook length.
11. Build up the eye area with thread. Finish off with whip finish or other knot.
12. Attach stick-on eyes. Use Hard As Nails, 2-Ton Epoxy, UV Epoxy over head area to secure eyes.


Sunday, January 09, 2000

Whitlock Saltwater Baitfish

Originator: Dave Whitlock

Species: bass, pike, pickeral, redfish, trout

Remarks:


Another great fly of the late 20th century that gets overlooked today. In fact, it's getting near impossible to find a Whitlock Saltwater Baitfish in fly shops. But make no mistake, this is a "must have" for the Louisiana speckled trout angler. It's also good for pickeral, redfish, and bass.

Here's an addition to the fly that makes it even more effective: tie in a couple strips of lead wire along the "nose" of the fly. This sinks the nose on the pause between strips, adding more action to the marabou tail. Try it, you'll like it!!

Along with the marabou action, the eyes on this fly make it special. Predatory fish key on eyes, especially in clear water.

Materials:

Hook: Mustad 34011 size 1 or equivalent. This is a stainless hook that allows for fresh or saltwater use.
Tail:
Marabou (chartreuse, white, or yellow works best)
2 wide grizzly hackle feathers
Collar: olive schlappen feather
Gills: red Flashabout or Krystal Flash
Eyes: 7mm doll eyes
Additional: black antron dubbing

Instructions:

1. Wrap a thread base from midway on the hook back to the bend of the hook.
2. Tie in a clump of marabou feathers, equal to length of the hook, at the midpoint of the hook.
3. Tie in one grizzly hackle feather on each side. Make sure the feather tip extends just a smidge beyond the marabou.
4. Tie in the schlappen feather and palmer forward, stroking back the feather barbs.
5. Tie in the Flashabou or Krystal Flash for gill on the bottom of the body.
6. Wrap the thread back just a little. Add some antron dubbing to the thread and wrap over. The dubbing builds up a base for the eyes to attach.
7. Mix a bit of 1-minute epoxy and soak the dubbing with it. Then place an eye on each side and press it against the antron. This will hold the eyes in place for now.
8. Mix up a tiny batch of 2-ton epoxy or use UV Epoxy and brush over the eyes and dubbing base. This will keep the eyes from getting knocked off by hard hitting predatory fish.
9. OPTIONAL: As mentioned, add a strip of lead wire to each side of the hook above the eyes. Secure with thread. Use mono thread if you wish to keep the base appearance.

Saturday, January 08, 2000

SR71 Seaducer

Originator: Ubiqitous

Version by: Catch Cormier

Species: freshwater, saltwater

Remarks by Catch Cormier


Seaducers are perhaps the most overlooked fly today. They've been around since the late 19th century, and have been used for nearly every predator species from brown trout to stripers to tarpon. They've been credited by Chico Fernandez in landing his world-record redfish.

The Godfather of Fly Fishing, Lefty Kreh, writes in his book, Presenting the Fly, that Seaducers are "one of the best patterns for both large and smallmouth bass that I've fished. I never make a trip without some of these in my box.".

Despite it's many accolades, this fly is seldom seen in fly shops. But if you tie flies, good news - they're easy to tie, and the materials are common.

The SR71 version differs from the standard Seaducer in that, like other "SR71" patterns modified by Catch Cormier, they use Schlappen feathers for the hackle as opposed to standard hackle. Of course, a very webby hackle feather will also work. Unlike the standard version which "pushes" water when stripped, the SR71 version "pulsates" when stripped. Less effective in stained water, but more effective in clear water.

Materials:

Hook: Mustad 34007 sizes 2 thru 1/0. This is a stainless hook that allows for fresh or saltwater use.
Tail: several strands of Flashabou or Krystal Flash, four saddle hackle feathers
Body: Schlappen or very webby long saddle hackles (6 inches or longer)
Best colors: red/white, red/orange, black/chartreuse, barred olive/barred olive

Instructions:

1. Tie in several strands of Flashabou or Krystal Flash.
2. Then tie two saddle hackle feathers on each side. The feathers are slightly curved; tie them splayed out.
3. For the body, tie in a pair of schlappen feathers with the tips tied to the hook. Then palmer the feathers toward the hook eye and secure off with thread.
4. Build up a few wraps near the eye of the hook. Then soak the wraps with Hard As Nails or epoxy to prevent the toothy fish from tearing up the wraps.

Friday, January 07, 2000

Pete's Perch Float Popper

Originator: Pete Cooper, Jr.

Species: freshwater, saltwater


Video: Version by Kirk Dietrich

Remarks by Catch Cormier

The Perch Float Popper is one of the best poppers for reds in the marsh. Cast it in front of a cruising fish, give it just a slight strip, pause, and then watch the red submarine on it. Witnessing a redfish eat a popper is one of the awesome spectacles of nature! Speckled trout and bass love them too, especially early and late, on overcast days, and on warm afternoons in winter along edges of lakes and canals.

This is a fly that lends itself to assembly line production: do a half-dozen or so one tying step at a time. For example, paint the outer eye on each one - by the time the last body is being painted, the first one is near dry. This is the most efficient use of time.

Materials:

Styrofoam perch floats - such as the Comal brand - in either 1 1/2" length or 2" (slightly wide) length. The larger corks are almost always used for saltwater, for choppy conditions, but require a higher weight rod to cast. The smaller floats can be cast with as little as a 3 weight, but a 5 weight is recommended.

A dremel bit tool, conehead sander.

Xacto knife.

Sanding paper, 400 grain is good.

34007 hook size 2 or 34011 size 4 gives it a "top dog" action.

acrylic paint in black, red, white, and other colors.

wooden dowels with different sizes

2-ton or 30 minute waterproof epoxy.
 
Instructions:
 
Body Using a Xacto knife, cut the perch float in half. Most of these floats come with a white end and a red end. I use the white end for this popper and save the red end for VOSIs, aka the flyfishers popping cork.

Create a slit by taking the Xacto knife and carefully cutting lengthwise to the center. Take the sandpaper and and pass the edge into the slit, then sand out the slit so it's wide enough to accept a hook. Take the Dremel bit and bore out a cup face in the wide end.

Hook. Tie thread onto a hook where the popper body will sit. Make the wraps open-spaced going down the shank, then come back up the shank also open-spaced and tie off. This creates a wrapping that is uneven, with spots for glue to fill in the cracks. Slide the hook shank into the float slit so that it's about midway to the center hole. Also, try and have the body close to the hook eye so there's room to tie the tail (later) on the hook shank. If the only space left to tie the tail is on the bend of the hook, you'll have to sand/cut some body off or go with a longer hook. Even the body on the hook, then squirt Zap-A-Gap or other instant glue along the slit. Let it sit a few minutes to bond tightly.

Painting. Kirk Dietrich suggest acrylic paints for several reasons: easy cleanup with water, easy to "feather", the combinations are infinite, and they are reasonably cheap. Select a green, blue, or other darker color for the body top. Thin the paint with water. You want to achieve an airbrush look. One way to do this is use a foam sponge. Dip it in the paint, remove the excess by dabbing it on a piece of cardboard until it's basically damp. Then dab it on top the body so a stippled effect is achieved.

Eyes.Use three different diameter dowels, or one size sharpened to three different sizes, dip the largest diameter into red paint. Then apply it to the front of the body on each side. To get a good circle, you may have to rotate the dowel a bit. After dried, dip the smaller diameter dowel into white paint. Apply it so that the outer edge of the white dowel is even with the edge of the red circle on the head end. Then dip the smallest dowel into black paint. Apply it so the outer edge of the black dowel is even with the edge of the red/white circle on the head end.

Other painting. You might use a fine brush to paint gills just behind and slightly under each eye. You might use the black dowel to paint a spot on the tail end.

Epoxying. Make sure everything is dry on the bodies. Squirt out about a quarter's size of mixed epoxy (hardener and resin) onto cardboard or aluminum foil. Mix with a toothpick or half of a wooden mixing stick. Take a brush and apply a thin coat over the body. Make sure to fill in the crack where the body slit was made. Apply some to the cupped face as well. Do this quickly and then put the body on your turning apparatus.

Drying apparatus. If you use 2-ton or waterproof epoxy, you're looking at 30 minutes before the epoxy dries. Until then, the flies must be turned to avoid sagging. Epoxy fly dryers are available from Cabelas and most fly shops that carry saltwater tying materials. A DIY dryer can be made from a barbecue rotissiere and a block of foam (pool noodle foam works great). Kirk offers a cheap alternative: put toothpicks into both sides of a foam, and manually turn the foam over every five (5) minutes. This is what I did when I first started and it works good. But if you start doing lots of epoxy flies, the turning apparatus will be much more convenient.

Give the poppers about a day before they are really abrasion-resistant to the teeth of speckled trout.

Best Colors. My favorite color is green/white just about all year long. But in winter or in dark water, I like to go with a black/gray. This requires applying gray to the entire body as a first step. Another good combination is a red band around the front of the body with white on the backside. And of course, an all-chartreuse body works because "speckled trout like any color as long as it's chartreuse"!

Thursday, January 06, 2000

Coma Spoon


Originator: Catch Cormier

Version by Catch Cormier

Species: bass, white bass, inshore brackish

Remarks by Catch Cormier:


Most spoon flies, such as Cave's Wobbler or Kirk's Spoon, are "wobblers". That is, the fly wobbles side-to-side when stripping. The Coma Spoon and the Kirshner Spinner are "spinners". That is, the fly rotates.

The Coma Spoon has a longer, narrower body than Kirk's Spoon, so it sinks faster. On a strip, the fly rotates one direction. During the pause between strips, the fly rotates back the other direction. To insure enough tension to make this happen, tippets used for the Coma Spoon should be no less than 12 pounds.

Spinner spoons are not as weedless as wobbler spoons, but as mentioned, they do sink faster. This makes them better suited for fishing canal banks and lake shorelines.

Materials:
- Mustad 34011 stainless hook, size 1.
- 1/4" mylar tubing (Wapsi Large).
- red thread
- 5 minute epoxy
- 30 minute (2 ton) transparent epoxy
- Best colors for mylar: gold, pearl, flashabou (gold/pearl), green.

Instructions:

Using a pair of pliers, make a series of slight bends in the hook until it assumes a somewhat "caddis" shape. Wrap thread base from eye back to halfway down bend of hook. Cut 1 3/4" section of mylar and slide down shank from front until any unraveled endings are past thread. Secure mylar at bend with thread and knot off with a whip finish. Mix together a tiny amount of 5 minute epoxy. Using a toothpick, dab some epoxy into the mylar. Make sure to cover as much surface as possible, and especially towards the back. You now have about 3 minutes to work with. Place thread over mylar about 1/8" down from the hook eye, and make 3 to 4 tight wraps. With rough pair of scissors, trim off excess mylar covering the hook eye, then wrap thread over end of mylar to form head. By now, the 5 minute epoxy should be ready. Don on pair of rubber gloves, then press mylar flat. Keep working the mylar as the epoxy begins to set. After the mylar is nice and flat, take the hook out. Make a twist in the mylar (about 30-45 degrees). Allow to set further. Later, using a brush, apply 30 minute epoxy to the outside of the fly to make it waterproof, durable, and shiny.


Wednesday, January 05, 2000

LaFleur's Charlie

Charlie Originator: Bob Nauheim

Version by Mike LaFleur

Species: inshore brackish

Remarks by Mike LaFleur:

This is not an original fly designed by me.The original Charlie was developed in the 1950’s for Bob Nauhiem and named after his Bahamian guide Charlie Smith, who tied it for him.

There are many variations of this fly, but they are all basically an inverted hook pattern. After many years of experimentation and field testing, this is how I tie my Charlie for redfish, speckled sea trout and flounder in the Louisiana saltwater marsh. It meets my three standards for a fly: 1) It is easy to tie; 2) It is durable; and 3) It catches fish.

Materials:

HOOK: #2 Mustad 34007 or #2 Mustad Signature C71S SS circle streamer

EYES: Lead dumbbell eyes painted red with black ends. I use the Wapsi brand sold at many fly shops and catalogues. The size and weight is most important. I use size X-SM with a 5/32 diameter, weighing about 1/50 of an ounce. A change in the weight will change the up and down motion of the fly in the water column. Lately, you can only find 1/40 or 1/60 ounce eyes. They both work OK. Use the red/black for the pink and chartreuse Charlies and yellow/black for the black Charlie.

THREAD: Danville’s Waxed Flymaster Plus -210 Denier thread or a 3/0 light pink thread.

BODY: For the pink and chartreuse Charlies, use pearl colored Long Flash Crystal Chenille. You can also use Umpqua’s pearl Estaz. For the black Charlie, I use black opalescent Estaz Grande for a fuller body.

WING: Craft Fur. Wapsi makes a good light pink craft fur CRF 104, and black CFR 100, but no chartreuse. Hareline makes a good chartreuse XCF54.

Instructions:

1. Put the hook in the vice with the hook down (the normal way). Tie in the thread behind the eye of the hook and wrap down about half of the hook shank and then back towards the eye to about one lead eye length from the eye of the hook, leaving enough room for a nice head. Tie in the lead eye using figure eights, etc.

2. Tie off the thread and remove the hook from the vice.

3. Coat the wraps that hold the dumbbell eye on the hook with super glue. I use Zap-A-Gap CA+, and I usually do a batch at a time.

4. After the glue is dry, put the hook back in the vice with the hook point down and the lead eye on top. Tie in the thread behind the lead eye and wrap back to the bend above the barb. Tie in the Crystal Chenille using several tight wraps to make it secure. Then advance the thread to behind the lead eye. Wrap the Chenille forward in close wraps to the lead eye. Make several tight wraps of the thread and cut off the excess Chenille. Bring the thread in front of the lead eye and then take the hook out of the vice and turn it over so the lead eye is down and the hook point is up.

5. Take the patch of Craft Fur and grab some of the strands that, when twisted together at the base, will be about 1/8 inch in diameter. Cut off as close to the base as possible. This will give you a length of about twice the length of the hook shank. Tie in the Craft Fur in between the lead eye and the eye of the hook, on the hook point side of the hook (on the top as it is sitting in the vice). Continue wrapping the thread between the lead eye and the eye of the hook to form a nice conical head. Whip finish and cut off the thread. Coat the head with head cement. I use Hard as Nails.


Tuesday, January 04, 2000

Jitterbee

Fly: Jitterbee

Originator:  Randy Leonpacher

Species:  Bluegill, redear, crappie

Remarks (by Randy Leonpacher):
The Jitterbee is an excellent bead head nymph that looks like a bee with a cricket-like tail. Best colors are black/orange, black/red or black/chartreuse. This bug is my first line of offense for bream. It can be fished deep or under a strike indicator. In either case don't set your rod down 'cause once the bream get sight of this bug its gone pecan....

Materials:
- Eagle Claw Baitholder #080 in size 8 or 10. The Eagle Claw 181 baitholder hook found at K-Mart can be used as a substitute. Both are 2X heavy and have large eyes suitable for the large metal bead.
- 4mm 10K gold plated metal bead (I prefer the Halcraft brand found at hobby stores).
- Medium chenille or fine chenille (vernille) in black, red, burnt orange, or chartreuse. The medium is right for the size 8 hook, the fine is perfect for the size 10 hook.
- Black silicon rubber skirt material (used for spinner baits).


Instructions:
1) Smash the hook shank barbs on the Baitholder hook and straighten the slight bend/offset.
2) Bend the hook point enough to slide the bead on, then bend back to normal.
3) Wrap hook shank with thread and tie short piece of silicon rubber leg -- about 1/3 of a single strand. Double over short piece to make a forked tail. Secure with thread.
4) Pair up and tie in one color chenille with another color. Secure them with thread back to the v-tail. Contrasting colors always work best, such as black/chartreuse or black/orange.
5) Wrap paired chenille forward around hook to form banded colors.
6) Secure chenille by tying in just behind bead head.
7) TIP: add a small amount of head cement on thread before putting final wraps to give it extra resiliency. You'll need it if your jitterbee is to have any chance of survival after it's been viciously assaulted by a few dozen gobbules!