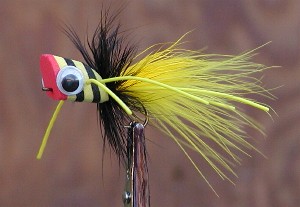
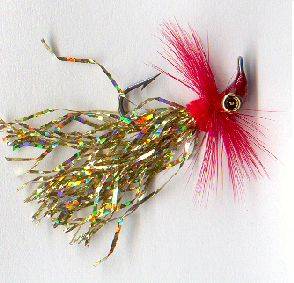
Originator: Ted CabaliSpecies: Bass
Remarks: by Catch Cormier
Previously known as the Sqwirm Worm - until that name became associated with a trout fly tied from Squirmy toy material - the Cabali Worm is one of several innovative creations from fly tying genius Ted Cabali of River Ridge, LA.
According to Cabali, the basis of this fly was "renewed
interest in fly patterns that imitate spinning or casting rod lures
rather than specific aquatic organisms". The Cabali Worm isn't a specific set pattern, but a group of patterns that closely imitate the conventional angler's plastic lures, and which use silicon strip material (trade name: Sili-Legs). For example, the original variation of this fly was a
saltwater attractor that imitated soft plastic baits used for speckled
trout and redfish.

The Cabali Worm was born
of the same principle, except with bass the intended target. The
instructions I list are for creating the worm body. What you do
with it is up to your creativity. The original Cabali Worms (flies on the
left) imitate more of a lizard or crawfish, and are deadly on spawning
bass. The variation on the right resembles more the
straight-tail plastic worm. Swim this fly by stripping it in small but
steady pulls. It's light enough to cast with a 5 weight, and float thru
grass mats like those found on many lakes, but still sinks without weight.
Materials:
Sillilegs, aka Silli Legs, come in many colors,
patterns, and sizes. For an idea of what colors and patterns are
available, check out the Barlow website. You can also find these same
type skirts at most fly shops.
This
fly calls for using the regular-size cut silicone skirt layers that are
slit to the last 1/4" on each end. The layers are very easy to use
because the ends are not slit. Other materials will include the hook of
your choice, flat waxed thread, and possibly chenille and beads (a
beadhead version of this fly, with a short, small hook, is a killer).
Instructions:
Each layer of sillilegs contains 20-22 strands. Depending on hook
thick a worm you wish to make, 10 to 16 strands are needed. The thinner
worms are more limp, have more action in the water, and are easier to
cast with a light rod. This needs to be balanced by the fact that
thicker worms can catch the bigger bass.
Let's make a 12 strand worm. Seperate each layer into two sets of
strands, 6 each. Cut one end of the layer, but leave the other end
intact. Grab the cut ends, seperate them, and begin twisting. After
enough twists, poke a finger in the middle (where the layer end is),
bring one end back to the other, and let the two ends slowly "bimini
twist" on each other. If the worm comes up a bit crooked, pull and
stretch the worm out a few times, and this will straighten it up. Use
small paper clips to hold the worms in place until the tying process is
ready.
I'll give two tying options here. The first calls for using a
Mustad 37187 bass hook. Bend the top 1/4" in a bendback-style. Then tie
the clipped end of your sqwirm body onto this bent section. The worm
will fall right alongside the point. In fact, pass the hook between
Sqwirm strands. Attaching a mono weedguard at this point also acts to
keep the sqwirm from sliding off the hook point and doing crazy things.
This pattern best represents the typical bass worm.
The second
option - my favorite - is the beadhead worm. I've found that 4" plastic
worms on a jighead can be as deadly on bigger bass as large worms with
large hooks. Just not as snagproof. I use a 4mm beadhead, vernille, and
size 4 or 6 jig style hook, 60 degree flat eye, usually black nickel. Tie the worm body to
the hook shaft, then tie in a matching vernille body and wrap up to the
beadhead. Finish off on the beadhead. This fly has incredible motion
when retrieved in small strips.
TYING TIP UPDATE 1 When twisting the split layer, the middle is
where the layer remains joined. If this "joined end" breaks, take the
two sections and merge them similar to a loop-to-loop connection. Then
restart the twisting.
TYING TIP UPDATE 2 The "joined end" is unstable as is. It won't
last but a few strikes from a fish, then the worm unravels. To prevent
this, make a Duncan Loop with mono, and slip it over the worm above
the joined end. Tighten the mono loop down firm around the tail,
then trim. You can even apply a tiny amount of super glue or UV epoxy around the
mono for durability.


