Wednesday, February 16, 2000

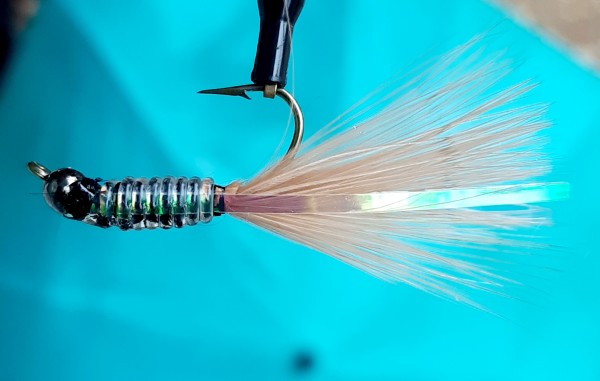
Black Boudreaux

Originator: Ray Boudreaux

Species: bream, crappie

Remarks by Catch Cormier:

One fly that has produced for me consistently under tough conditions, when fish are reluctant to eat surface bugs or larger food items, has been the Black Boudreaux and it's spinoffs, the Purple Boudreaux and Blue Boudreaux.

This pattern was created by Ray Boudreaux of New Iberia, a longtime member of Acadiana Fly Rodders. As Ray tells it, he had just joined AFR and participated in a fishing outing at a local pond. One of the members was having great success catching bream on a small fly.  Ray tried to recreate the fly and in the process, came up with something different. Fellow member Bob Boese was so impressed with the fly, he named it after Ray.

Bob's variation of this fly uses brown or black hackle for the tail, and tinsel instead of peacock for the body. I tie on Czech nymph hook in a slightly larger size, with the original body, but have adapted from Bob the use of hackle for the tail.

Materials:

  • hook: size 12 Czech nymph, Hanak H333BL or similar thread: size 6/0 black
  • tail: hackle feathers from near base of feather
  • body: peacock herl (black, purple, blue)
  • hackle: dry fly hackle (black, purple, blue)
  • eyes: small bead chain black

Instructions:

  • Tie in the bead chain eyes one eye length behind the hook eye
  • Pull off 8-10 barbs off the pennaceous section of a hackle feather and tie in as a tail.
  • Tie in a size 10-14 hackle feather... size not too important as you'll trim the feather down.
  • Tie in a strand of peacock herl. For strength and bulk, I tie it in a dubbing loop then twist the loop.
  • Wrap the peacock herl forward and tie off just behind the bead eyes. Then palmer the feather forward and tie off just behind the bead eyes.
  • Bring the thread ahead of the bead eyes and make the final wraps. Add UV epoxy or similiar to the final wraps.

Notes:

This fly can be fished "straight" but also under a tiny football-style strike indicator.

Video:


Monday, February 14, 2000

Y2K Bugger

Originator: Kevin Cormier

Species: bass, brown trout, bream (size 8)

Remarks by Catch Cormier:

On a trip to Cody, Wyoming, my older son Kevin and I found ourselves chasing big browns on the Shoshone River below Buffalo Bill Dam. We were using a pattern called a Yukbugger, beefy variation of a woolybugger, recommended by the local shop.
 
The fish were 18 inches on up, and in the strong current, we had a couple of breakoffs. As well as a few lost to overhanging trees. I had my tying bag, and so Kevin decided to try his skill at tying this fly. It looked quite different from what we were fishing, but turned out to be just as effective.

Since it was 1999, and everyone was preoccupied with Y2K and possible end of the world, we named Kevin's fly the Y2K Bugger. For various species, it's been the end of their world (at least the ones we kept to eat).

Materials:

  • Mustad 3366-BR size 4, or equivalent
  • Brass eyes, medium, black
  • Marabou
  • Krystal Flash Chenille, medium
  • Schlapplen
  • Silli Legs - barred

Best color combos:

  • olive marabou/ olive chenille / yellow-gold-black legging
  • tan marabout / bonefish tan chenille / orange-orange-black legging

Preparation:

Fold a silicon skirt lengthwise in half, then cut the skirt in half. This is the exact length of legging that will be needed for this fly.

Instructions:

  • tie thread from eye to just past the hook bend
  • tie in eyes
  • tie in marabou tail just where the hook starts to bend. When done right, the top of the marabou should be even with the hook shank.
  • tie in two legs on top of marabou that extend to end of marabou. Wrap the thread over legs halfway to the eyes.
  • tie in the chenille and begin wrapping to the front. When you get to the legging tag ends, pull the tag ends backward and wrap the chenille tight over the tags. This should set them about 45 degrees out from the body.
  • Continue wrapping the chenille to just behind the eyes and lock down with thread.  Now tie in a another silicon strip just behind the eyes.  The strip will be tied in the middle – so you have a leg extending out on each side.  Use a cross wrap to get the legs angled back about 45 degrees.
  • Now turn the fly over to tie in the wing.
  • Two options for the wing, both tied in front of the eyes: (1) make a dubbing loop with the schlapplen fibers. Wrap the fibers once around the hook, then trim any fibers on the underside of the body. (2) strip off two short sections of schlapplen fibers and tie each section in at an angle, much like you would tail biots on a Prince Nymph.
  • Finish the head wraps and apply UV epoxy or nail polish.

Other Notes:

This fly can be tied in a size 8, and with a shorter tail to body ratio, where it then becomes a terrific attractor for redear and large bluegill during the early Spring and Fall months.


Saturday, February 12, 2000

Coma Crawfish

Originator: Catch Cormier
 
Species: warmwater

Remarks by Catch Cormier:

Having grown up on the outskirts of Louisiana’s Atchafalaya Basin, I knew everything that lived in the swamp ate crawfish - especially us Cajuns! So one of the first flies I set out to create was some sort of mudbug imitation.

Gary Borger believes the most effective submergent flies have subtle movements in water. I wholeheartedly agree! So I used a combination of natural materials to achieve this.  Consisting of feathers, marabou, rabbit fur, this fly has very good movement even if it isn't as realistic as some modern day patterns.

One thing I learned from my dad, and later affirmed as a successful tournament bass angler, is that bass much prefer small crawfish.  I’ve seen them munch on small mudbugs the way some kids eat chicken nuggets!  That's the reason this fly measures only 2-1/2 inches in length. Don't let the small size fool you... in 1995, it took a seven pound bass out of our neighborhood pond. The biggest largemouth I'd caught on any tackle up to that time!

It's best fished on a sinking tip line with a short leader. Originally I had to bend the front of the hook 60 degrees. When 90 degree jig hooks were available, I tied on those. Fortunately today we have a few options of 60 degree jig hooks available for tiers.

Materials:

  • Hook: Daiichi 4660 jig hook, or 60 degree jig, size 2
  • Eyes: Brass, large, black
  • Carapace: Rabbit Zonker, Orange or Light Olive
  • Claws: Indian hen hackle orange or olive
  • Body: Medium chenille, brown or olive
  • Legs: Strung marabou, Rusty Brown or Dark Olive
  • Tailing: Rabbit zonker, Crawfish Orange (dark orange)

Best color combos: orange or olive

Instructions:

  • tie thread from eye to just above hook point
  • tie in eyes in front where the hook bends (60 or 90 degree)
  • pull hen feather from each side of cape and tie on top of hook
  • tie in the carapace. It should extend no further than halfway to end of feathers
  • tie in chenille and make 2-3 wraps. Tie off the chenille.
  • tie in a clump of marabou tips loosely, then allow to spin 180 degrees, then cinch tie the marabou.
  • tie in another small piece of chenille and wrap to just behind the eyes and lock down.
  • make a dubbing loop using the dark orange or dark olive rabbit, and wrap just behind the eyes.
  • bring the thread to the just behind the hook eye and whip finish.


Thursday, February 10, 2000

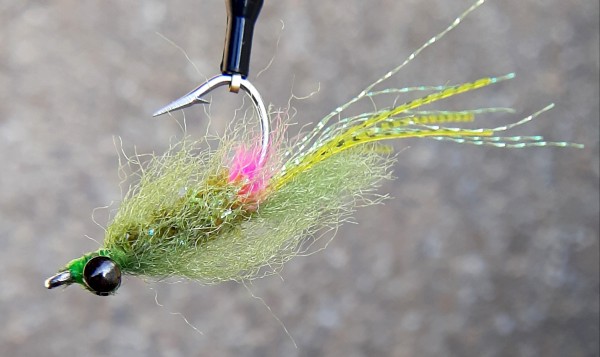
GBEP Spawning Shrimp

Originator: Enrico Puglisi

Variation: Justin Hanson

Species: inshore saltwater

Remarks by Catch Cormier


This fly is a hybrid of the wildly-popular EP Spawning Shrimp and the GB (Got Butter) Spawning Shrimp by Justin Hanson. The materials and techniques are identical to the GB version, except instead of artic fox (GB) I use EP fibers - but NOT the brush!  Ideally, the GB version would be ideal...artic fox is amazing material. But to do the GB fly proper requires 3" fur - difficult to find!

From May through October, when shrimp are prevalent throughout the marsh and nearshore waters, this fly rules!  You can fish it "straight", i.e., cast it out, let it sink, then retrieve along the bottom in short strips.  But the most effective method is suspended about 3 feet under a VOSI (the flyrodders popping cork).  The VOSI makes a popping sound that attracts specks, the strip/pause technique causes a vertical motion of the fly underneath.  

Materials:

  • hook: Mustad 34007 or Tiemco 811s, size #2 or #1
  • thread: Danville 210 denier flat waxed nylon
  • weight: 1/50 ounce dumbbell eyes
  • egg sack: McFly foam or craft fur (orange or pink)
  • eyes:  EZ Shrimp eyes, or EP Shrimp eyes, or monofilament DIY
  • antennae 1: Sili-Legs, or Loco Legs
  • antennae 2: Krystal Flash
  • carapace: EP fibers
  • body: cactus chenille
  • wing:  EP fibers


Best colors: olive, tan, light pink

NOTE:  The mono/EP Shrimp Eyes make a better looking fly, but aren't necessary as far as fish catching ability goes.  The fish seem to concentrate more on the action of the materials.

Instruction:

  1. Tie in the dumbbell weight near the hook eye.
  2. Tie in 6-8 strands of Krystal Flash at the bend of hook
  3. Tie in 4 strands of Sili-Legs at the bend of hook
  4. Tie in carapace of EP Fibers, trim to V-shape
  5. Tie in shrimp eyes on bottom of hook extending out but not beyond the hook itself.
  6. Tie in small, very short clump of pink craft fur (or McFly) on bottom side of bend.
  7. Tie in Cactus Chenille and wrap forward, tie off behind dumbbell eyes.
  8. Tie in strand of EP Fiber on bottom side of hook
  9. Optionally, tie strand of EP Fiber on top side of hook, but not past carapace.
  10. Whip finish head and apply sealant.
  11. Trim antennae (Sili-Legs and Krystal Flash) such that fly length is twice that of hook length.

Notes: 

Here's a link to Justin's video on the GB Spawning Shrimp


Wednesday, February 09, 2000

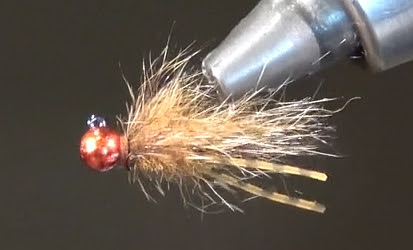
Rio Bandito

Originator: Chris Johnson

Species: Rio Grande Perch, sunfish

Remarks by Jim Johnson


The Rio Bandito is sometimes referred to as the Mardi Kraw, although there's another fly of that same name. It was created by Chris Johnson of Living Waters Fly Fishing, for the Rio Grande Perch in the Hill Country waters of Texas.

I bought a couple while in the shop a couple of years ago and when I returned to Louisiana I found it to be my go to fly. I’ve caught nearly every species of sunfish we have here to include crappie, warmouth, and both spotted and largemouth bass. It’s murder on small creeks!

Materials:

  • hook: Jig hook - size 12
  • bead: tungsten beads - metallic red - size 1/8”
  • tail: guard hairs of fur
  • body/collar: fur dubbing in a loop (rabbit or squirrel strips)
  • legs: silicone legs, matching color

Best colors:  crawfish orange, natural, olive

Instruction:

Video by Chris Johnson

Johnson's Rio Bandito from Living Waters Fly Fishing on Vimeo.


Other:

At the 2020 annual "Rio Grande Fly Fishing Rodeo" hosted by the New Orleans Fly Fishers, Glen 'Catch' Cormier won "Biggest Rio" category using a crawfish-colored Rio Bandito. 

Monday, February 07, 2000

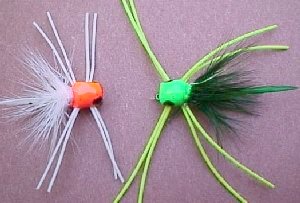
Flip Flop Popper

Originator: ubiquitous

Version by: Roger del Rio

Species: reds, specks, bass, sunfish

Remarks by Roger del Rio:


Game fish love surface poppers. The noise attracts fish especially when the water is murky or the light level is low.  In fact, some of the biggest reds I've caught were on this fly in dirty water. It floats high and is very durable.

Materials:

  • Hook (saltwater): - Mustad 34007 sizes 1 to 2/0, or Mustad 34011 long shank 2 to 2/0
  • Hook (freshwater) - Mustad wide gap 37187 sizes 2 to 6
  • Body: any color Shower Sandal or Flip Flop. Can be found at Wal-Mart, Walgreens or other general store.
  • Tail: bucktail color to complement body. Also use a few strands of Flashabou in tail.
  • Eyes: doll eyes sizes 5mm to 8mm depending on body size.


Instructions:

  1.  Use a sharp knife or single edge razor blade. Toothpick used in applying glue.
  2.  Cut the sandal into strips from left side to right side. Make strip wide enough to
  3.  Fit your hook.Then cut smaller pieces to make each body.
  4.  Shape this body with the knife or razor blade then fine tune the body with coarse sandpaper or emery board. The shape is up to you. They all catch fish.
  5.  Now cut a groove on bottom of body for the hook. Wrap the shank where it will fit in the body groove. This keeps body from rolling.
  6.  Now glue wraped hook into groove in body. Use plenty of Hosehold Goop on body. Cover entire bottom. Work hook deep into groove.
  7.  Let set over night upside down wedged in a clothespin. The goop will smooth out when drying.
  8.  Wrap bucktail on hook behind body add flashabou. Don't overdo it.
  9.  Last step glue on doll eyes with same Goop.
  10.  Let dry go fish. 


Saturday, February 05, 2000

Amnesia Fly

Originator: unknown

Species: bass, panfish, pickerel

Remarks: by Catch Cormier

At the Acadiana Fly Rodders annual conclave in 2002, I won a posterboard of flies in a raffle. It contained over a hundred flies tied by members of the club, or by folks who had donated old flies to the club.

When I got it home, I started picking through the collection, seperating them into boxes for salt water, bream, bass and coldwater trout. Turns out there was one fly that had fallen from the posterboard the night I brought it home. When I discovered it, my wife claims I set a new record in the 400-meter dash. That’s about how far it was from my back door to the edge of the neighborhood pond.

Four of the five voices in my head told me this fly was going to be special. The instant I cast it out and it hit the water, the fish were over it like crawfish etouffee over rice!

I made every attempt to find out who tied this fly and what it's name was, but no one knew. I then perused the internet hoping to find the pattern somewhere, but again to no avail. Someone suggested I call it the "Amnesia Fly", because it doesn’t recall what it’s real name is, or who tied it.

I’ve done very well with this fly for bass, bream, crappie and pickerel. I’ve even tied a saltwater version for redfish, and it’s done well too.  I'm sharing this pattern recipe just in case I get amnesia myself and forget.

Materials:

  • Hook: Mustad 9672 sizes 6 or 8 (larger sizes for bass)
  • Tail: Marabou
  • Body: Metallic braid wrapped around the shank, with one strand of flashabou on each side extending just past the tail
  • Ribbing: monofilament or small diameter v-ribbing
  • Head: Built up with thread then epoxied over
  • Alternative head: 3/16" black bead brass (mid-depth) or tungsten (deep)


Best colors: black, olive, purple

Instructions:

  1. Tie in the marabou tail. The length should be same as the hook shank length.
  2. Tie in one flashabou strand each side, with the strands going forward (not towards the back).
  3. Tie in the ribbing on top the hook, starting just behind the eye (or bead) and going back to just before the bend.
  4. Tie in the metallic braid to just before the bend. Bring the thread to behind the eye.
  5. Wrap the metallic braid going forward and tie off at the eye.
  6. Pull the flashabou strands back toward the tail. Pinch in place while wrapping the ribbing forward.
  7. Tie off the ribbing at the eye.
  8. Trim the flashabou to just past the end of the tail.


Friday, February 04, 2000

Slow Sinking Spider

Originator: Stephen Robert

Species: panfish, bass

Remarks:

The Slow Sinking Spider is the creation of Stephen Robert of Houma, Louisiana, and has become one of the best bream (sunfish) flies anywhere. It's a replacement - and an improvement - to the legendary Accardo Ligon Spider, which is now discontinued.

Stephen says, "I use this pattern sight fishing to bluegill and bass. If you have bright sunny days and the fish will not hit poppers and you can see the fish let this fall slowly in their face or in their beds.".

In their presentation, "Magnificient Seven Panfish Flies", warmwater experts Glen 'Catch' Cormier and Larry Offner list it in the seven must-have flies. On many occasions, this fly has done the trick when popping bugs or deep nymphs have drawn few strikes. The SSS is not only a great pattern, but is fairly easy to tie. Making it a good choice for novice tiers.

Materials:

  • Hook: Mustad dry fly hook-R50-94840, or equivalent, size 10
  • Abdomen: ultra chenille (color 1)
  • Thorax and backing: ultra chenille (color 2)
  • Legs: barred sili-legs or centipede legs
  • Thread: size 70 denier or 6/0 thread black

Best color combinations, thorax/abdomen: black/chartreuse, black/yellow, black/red, red/yellow, light blue/tan

Instruction:

Video by Bill Morrison


Thursday, February 03, 2000

Ron's Redchaser

Originator:  Ron Begnaud

Species:  redfish, drum, other inshore species

Remarks: by Ron Begnaud

Ron's Redchaser is a fly I developed in the Spring of 2001. One of the things I find most rewarding about fly tying is the problem solving aspect of it. I was met with the challenges of the marsh being particularly muddy. I needed a fly that would be visible in bad water. I also wanted a fly that would push water and look like a mouthfull to big fish. Having already come to the conclusion that the mouth of redfish is on the bottom of their head for a reason (they feed down) I knew I wanted a fly with a little weight that would settle on the bottom. 

Combining these attributes, plus a desire to always have the fly ride hook up, and be fairly weedless, the redchaser was born. After first developing this fly it took me a long time to actually get a fish to refuse it. It produced agressive strikes in many varied conditions. Rons Redchaser is now my go to and signature redfish fly. I hope it catches as many fish for you as it has for me.

Materials:

  • Hook - Eagle Claw EC413 60 degree jig hook, or Mustad 34007 with eye bent 60 degrees toward point, size 2 or 4
  • Thread - Red Flat Waxed Nylon
  • Eyes - Small or Xsmall dumbell or hourglass eyes
  • Tail - Gold Braided Mylar piping, or prismatic gold polyester piping (pictured) available in sewing dept of Hobby Lobby.
  • Body - 2 Wraps of red chenille
  • Hackle - 2 red saltwater neck hackles, palmered.
  • Head - 5 minute epoxy


Instructions:

  1.  Sharpen hook
  2.  If using Mustad 34007, place eye of hook in vice, and bend toward point at about 60 degrees to resemble a jig hook.
  3.  Tie in dumbell or hourglass eyes on top of hook right behind 60 degree bend.
  4.  Tie in a tail of gold mylar or prismatic polyester piping. If the piping is of a small/narrow size, e 2 or 3 peices of equal length.
  5. When tying in piping begin less than 1/2 inch behind eyes.
  6.  Fray piping to form tail.
  7.  Tie in end of chenille in where mylar is tied in, make 2 or 3 wraps and tie off front end.
  8.  Tie in 2 red saltwater hackles and palmer to just behind eyes.
  9.  Apply 5 minute epoxy from dumbell or hourglass eyes to eye of hook and rotate to dry.

Wednesday, February 02, 2000

Cabali Worm

Originator:  Ted Cabali

Species:  Bass

Remarks: by Catch Cormier

Previously known as the Sqwirm Worm - until that name became associated with a trout fly tied from Squirmy toy material - the Cabali Worm is one of several innovative creations from fly tying genius Ted Cabali of River Ridge, LA.  

According to Cabali, the basis of this fly was "renewed interest in fly patterns that imitate spinning or casting rod lures rather than specific aquatic organisms".  The Cabali Worm isn't a specific set pattern, but a group of patterns that closely imitate the conventional angler's plastic lures, and which use silicon strip material (trade name: Sili-Legs).  For example, the original variation of this fly was a saltwater attractor that imitated soft plastic baits used for speckled trout and redfish.

The Cabali Worm was born of the same principle, except with bass the intended target. The instructions I list are for creating the worm body. What you do with it is up to your creativity. The original Cabali Worms (flies on the left) imitate more of a lizard or crawfish, and are deadly on spawning bass. The variation on the right resembles more the straight-tail plastic worm. Swim this fly by stripping it in small but steady pulls. It's light enough to cast with a 5 weight, and float thru grass mats like those found on many lakes, but still sinks without weight.


Materials:

Sillilegs, aka Silli Legs, come in many colors, patterns, and sizes. For an idea of what colors and patterns are available, check out the Barlow website. You can also find these same type skirts at most fly shops.

This fly calls for using the regular-size cut silicone skirt layers that are slit to the last 1/4" on each end. The layers are very easy to use because the ends are not slit. Other materials will include the hook of your choice, flat waxed thread, and possibly chenille and beads (a beadhead version of this fly, with a short, small hook, is a killer).

Instructions:

Each layer of sillilegs contains 20-22 strands. Depending on hook thick a worm you wish to make, 10 to 16 strands are needed. The thinner worms are more limp, have more action in the water, and are easier to cast with a light rod. This needs to be balanced by the fact that thicker worms can catch the bigger bass.

Let's make a 12 strand worm. Seperate each layer into two sets of strands, 6 each. Cut one end of the layer, but leave the other end intact. Grab the cut ends, seperate them, and begin twisting. After enough twists, poke a finger in the middle (where the layer end is), bring one end back to the other, and let the two ends slowly "bimini twist" on each other. If the worm comes up a bit crooked, pull and stretch the worm out a few times, and this will straighten it up. Use small paper clips to hold the worms in place until the tying process is ready.

I'll give two tying options here. The first calls for using a Mustad 37187 bass hook. Bend the top 1/4" in a bendback-style. Then tie the clipped end of your sqwirm body onto this bent section. The worm will fall right alongside the point. In fact, pass the hook between Sqwirm strands. Attaching a mono weedguard at this point also acts to keep the sqwirm from sliding off the hook point and doing crazy things. This pattern best represents the typical bass worm.

The second option - my favorite - is the beadhead worm. I've found that 4" plastic worms on a jighead can be as deadly on bigger bass as large worms with large hooks. Just not as snagproof. I use a 4mm beadhead, vernille, and size 4 or 6 jig style hook, 60 degree flat eye, usually black nickel.  Tie the worm body to the hook shaft, then tie in a matching vernille body and wrap up to the beadhead. Finish off on the beadhead. This fly has incredible motion when retrieved in small strips.

TYING TIP UPDATE 1 When twisting the split layer, the middle is where the layer remains joined. If this "joined end" breaks, take the two sections and merge them similar to a loop-to-loop connection. Then restart the twisting.

TYING TIP UPDATE 2 The "joined end" is unstable as is. It won't last but a few strikes from a fish, then the worm unravels. To prevent this, make a Duncan Loop with mono, and slip it over the worm above the joined end. Tighten the mono loop down firm around the tail, then trim. You can even apply a tiny amount of super glue or UV epoxy around the mono for durability.

Tuesday, February 01, 2000

Shiny Fon-Fon

Originator: Barry Dauphin

Species: inshore brackish

Remarks:

Redfish love charlies of all kinds, and this pattern by Barry Dauphin of Lafayette is a cousin to the charlie, but without the wing. The secret to the flies success, and to its name, is the shiny tail. Barry says the tail on the Shiny Fon-Fon is that little extra, or lagniappe, that gets Mr. Redfish on the fly like a hungry Cajun on french bread!

Materials:

  •  Mustad 34007 hook size 2
  •  Dyed yellow grizzly hackle feather
  •  Large bead chain eyes
  •  Pink chenille
  •  Silver krystal flash
  •  Silver flashabou, narrow in width


Instructions:

  1. Tie in eyes and wrap thread toward bend of hook.
  2.  Tie in 50/50 mix of krystal and flashabou for tail, length of tail should be length of hook
  3. Tie in the hackle feather at bend, followed by the chenille.
  4. Wrap the chenille toward the front, covering the hook and tying off behind the bead eye.
  5. Palmer the feather towards the front, and tie off behind the bead eyes.
  6. For added durability, use epoxy or clear nail polish on the threads between the eye of the hook and the bead chain.eyes.

Saturday, January 29, 2000

Kirk's Spoon Fly

Originator: Kirk Dietrich

Species: redfish, drum, sheepshead, bass

Remarks:

The most popular redfish flies of all time are the spoon flies. These originated with Cave's Wobbler in the early 80s. Jon Cave of Florida intended to combine the flash and action of the baitcaster's spoon with the lifelike imitation of a traditional shrimp fly pattern. Despite it's effectiveness on redfish, purists decried the Wobbler as heresy!

Kirk Dietrich of Louisiana discovered that by retaining the mylar body and eliminating all other features, the spoon fly was easier to cast and had more action. Over the last decade, tiers have searched for every possible means to make spoon flies easier to make. If the purists had a fit over Cave's Wobbler, imagine what they think about aluminum drink can metal cut to a teardrop shape and epoxied to a hook. Or, plastic fingernails superglued to a hook and covered with glittered enamel.

Despite all it's permutations, the mylar versions remain tops. They are flashier and more durable. Not to mention more aesthetic. Kirk's variety is a "wobbler", that is, the fly wobbles side-to-side when stripping. A few wraps of lead wire under the mylar and at the end of the shank insure the hook remains up. For the grass-filled shallow brackish ponds near Delacroix, Myrtle Grove, Golden Meadow, Chauvin, Dularge, and Hackberry, Kirk's Spoon is a must-have!

For more about Kirk Dietrich and his flies, check out his bio at the Fly Tying World web site.


Video:

Kirk has put together four (4) videos on tying his spoon flies. These cover the basics, as well as possible enhancments to this pattern.  He also details his thoughts on why certain techniques are more effective.  Here's the link to the first video:

https://www.youtube.com/watch?reload=9&v=FexkMwWC5Ag

Materials:

- Mustad 34007 stainless hook, size 2.
- 3/8" mylar tubing.
- lead wire size 20 gauge
- red thread
- 5 minute epoxy
- 30 minute (2 ton) transparent epoxy
- Best colors for mylar: gold, flashabou (gold/pearl), green, silver, root beer.

Instructions:

  1. Using a pair of pliers, make a series of slight bends in the hook until it assumes a somewhat "caddis" shape. 
  2. Wrap thread base from eye back to halfway down bend of hook. 
  3. Make 6 to 8 wraps of lead wire at end of shank and trim off. 
  4. Cut 1 1/2" section of mylar and slide down shank from front until any unraveled endings are past thread. 
  5. Secure mylar at bend with thread and knot off with a whip finish.
  6. Mix together a tiny amount of 5 minute epoxy. Using a toothpick, dab some epoxy into the mylar. Make sure to cover as much surface as possible, and especially towards the back. You now have about 3 minutes to work with. 
  7. Place thread over mylar about 1/8" down from the hook eye, and make 3 to 4 tight wraps. 
  8. With rough pair of scissors, trim off excess mylar covering the hook eye, then wrap thread over end of mylar to form head. 
  9. By now, the 5 minute epoxy should be ready. Don on pair of rubber gloves, then press mylar flat. Keep working the mylar as the epoxy begins to set. 
  10. After the mylar is nice and flat, take the hook out and slip your thumb under the hook point and press. This creates the concave feature that gives the fly its wobble. Allow to set further.
  11. Later, using a brush, apply 30 minute epoxy to the outside of the fly to make it waterproof, durable, and shiny. 
  12. For best results, leave the fly exposed to sunlight for about 24 hours.

Friday, January 28, 2000

Foam Popping Bug

Originator: Ubiqitous

Version by: Randy Leonpacher

Species: bluegill

Remarks by Randy Leonpacher:

Nothing is more fun than catching brimskis on popping bugs. There are so many bugs around water in Louisiana, that you'd better have a full tank of windshield fluid anytime you drive after dark. For this reason, the best time to use popping bugs is the last two hours before twilight. These bugs are easy and cheap to make. Which is good, because so many will get hung up in the willow and cypress trees. It's not that you can't get your bugs out of these trees, it's just that you may have to fend off wasps to do so. Personally, I'd rather donate the fly to the tree.

Materials:

- Mustad 9672 or popper hook, size 8 or 10.
- flip flop foam.
- rubber leg material.
- narrow brass tubing.
- hackle feathers.

Instructions:

  1. Use the narrow brass tubing to "drill" out a cylinder of flip flop foam. A mult-colored, layered flip flop can produced several different color patterns from a single drill.
  2. Each flip flop section is then fastened to a hook by making an incision, putting the hook shank into the incision, and securing with super glue.
  3. Rubber legs are passed thru the body
  4. Feathers are tied, with one palmered behind the body for a tail. 
  5. Eyes can be painted on with permanent markers or nail polish
  6. Use a clear lacquer to coat the body for shine and durability. 
Other:

Thursday, January 27, 2000

Sanibel Special

Originator: Catch Cormier

Species: ladyfish, redfish, Florida snook

Remarks:


The Sanibel Special combines elements of a rattle rouser, charlie, and several popular Florida snook flies which are usually monotonic white. While it's a proven killer for snook, especially under lights, the Special has been very special for Lake Ponchartrain ladyfish. It also works equally well for reds along pipes or dropoffs in deadend canals during winter months.

Materials:
  • Mustad 34007 stainless hook, size 2.
  • 1/100 oz Brite Eyes (non-lead) hourglass eyes.
  • 3/8" pearlescent mylar tubing.
  •  glass rattles 16mm long
  • white thread
  • color substitutions for mylar: silver, gold, flashabou (gold/pearl).

Instructions:
  1. Wrap thread toward bend of hook. 
  2. Cut two sections of mylar, each 1 1/2" long. Lay one section of mylar along top of hook. This will create the mylar body and tail. 
  3. Secure the mylar at the bend of hook, then knot off (whip finish preferred). 
  4. Slide glass rattle into mylar, then secure the front end of the mylar with thread (sealing off the rattle. 
  5. Next, tie in the eyes. 
  6. Flip hook over, and lay the second section of mylar on bottom of hook. This will create the mylar wing. Make sure the ends of both mylar sections are even. 
  7. Tie off the wing section in front of eyes, and finish the head with a whip finish. 
  8. Apply a couple of drops of head cement to the lower half (near the eye) of the mylar wing. Pinch the mylar momentarily so the cement locks into the mylar. This will keep the lower end from unraveling. 
  9. Next, unravel the upper end of the wing, and also the tail. 
  10. Finally, take a fine brush and apply 30 minute (2 Ton) transparent epoxy to the body and head.
Other:

Like all epoxy flies, this is best done as a batch. While UV resin yields acceptable results, it doesn't have the same endurance as 30-minute clear epoxy.  The Devcon 2-Ton variety coats on clear and remains clear.

Wednesday, January 26, 2000

Tom Nixon Spinner

Originator: Tom Nixon

Version by: Tom Nixon

Species: bass, sunfish, crappie, white bass, pickeral

Remarks:

In his landmark book, "Fly Tying and Fly Fishing for Bass and Panfish", warmwater fly fishing legend Tom Nixon of Lake Charles, LA, details numerous patterns that utilize spinners, and goes into great detail about the different types of blades and their action. Purists may be offended, but spinners on flies is part of the warmwater tradition. "They catch fish", Nixon says, "because of how much action they give with little or no forward motion. The oscillation transmits flashing 'here i am' signals to any and all nearby creatures".

There are two types of spinner flies: inline and offset. The inline flies are easier to cast with light rods and tied on sizes 6-8 can catch a wide variety of fish. While his Mickey Brim and Feather Duster are classics of their own, this particular pattern emerged in recent years, and has been an absolute killer on bass and crappie. Whatever name Tom gave it has been obsoleted, such a great fly deserves the name of the master who created it!

Materials:

- 6 gauge stainless steel or bright music wire
- #14 brass barrel swivels
- light weight beads 1/8" in diameter in various colors
- #3 or #4 Indiana spinner blade
- size 6 or 8 Mustad #3366 hook or equal
- chartreuse, white, or black yarn for body
- copper wire for ribbing
- calf tail or soft hackle in color coordinated to yarn

Instructions:

1) Cut a section of wire about 3 inches, you need only about half of that, the rest makes it easier to work with.
2) Tie the feather or calf tail on the hook as normal.
3) Fasten the hook to the wire shaft by forming an eye on the wire. Cinch off the eye with three turns of wire, then trim.
4) Tie in thread on the harness wire, tie in the copper wire. Tie in yarn or begin dubbing at the end of the wire near the hook.
5) Bring the yarn or dubbing forward up about an inch, then spiral the copper wire forward to that point. Tie off the yarn and copper wire, and secure with knot.
6) slide 3 beads down the wire, then the spinner, then a single bead.
7) Create an eye on the last segment of the harness wire, by doubling back and wrapping around the shaft 3 times, then trimming. Make sure you leave enough room on the shaft for the beads to slide a little.
8) Go fishing.

Other:

Tom Nixon's book has been out of print for over a decade. However a copy occasionally pops up on eBay. It's not just instructional on tying and fishing, the book is chocked full of great stories you'll want to read over and over again!


Tuesday, January 25, 2000

Kathy's Golden Spider

Originator: Derrell Nantze

Version by: Derrell Nantze

Species: Trout, bream

Remarks by Derrell Nantze:

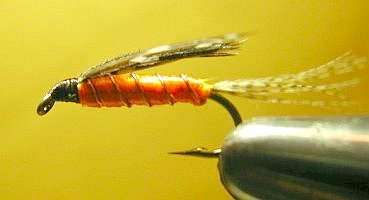
This is a knockoff of the Brown Spider nymph, just faster and easier to tie. I use 100% Rayon knitting yarn for the body, but floss could be substituted - it's just harder to work with. The yarn undergoes a translucsent color change when wet.

Materials:

Hook: #14, 12 or 10 Standard nymph hook
Thread: #8/0 dark brown uni-thread
Body: Gold #4 knitting yarn 100%Rayon (I like Mira by UTK)
Wing: Guinea
Tail: Wood duck flank
Rib: fine copper wire

Instructions:

Start thread and wrap lead weight
Attach tail (body length),rib and yarn at rear of hook
Wrap and tie off body, leaving 1 eyelet gap for head
Wrap and tie off rib
Attach Guinea wing
Build head and whip finish

Monday, January 24, 2000

Kathy's Silver Minnow

Originator: Derrell Nantze

Version by: Derrell Nantze

Species: Bream, crappie

Remarks by Derrell Nantze:

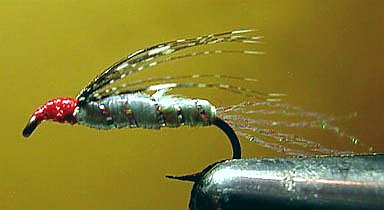
Fished as a nymph under an indicator, this pattern can draw vicious attacks around lily pads and cypress trees. I use 100% Rayon knitting yarn for the body, but floss could be substituted - it's just harder to work with. The yarn undergoes a translucsent color change when wet.

Materials:

Hook: #14, 12 or 10 Standard nymph hook
Thread: #8/0 Red unithread
Body: Silver #4 knitting yarn 100%Rayon (I like Mira by UTK)
Wing: Guinea
Tail: Pearl Krystal Flash
Rib: Pearlescent tinsel or fine wire
Weight: 8 or so wraps of lead, .15 or .20

Instructions:

Start thread and wrap lead weight
Attach tail (body length),rib and yarn at rear of hook
Wrap and tie off body, leaving 1 1/2 eyelet gap for head
Wrap and tie off rib
Attach Guinea wing
Build up red head and whip finish

Quick and easy!

Sunday, January 23, 2000

Cap Spider

Originator: Mike Verduin

Version by: Mike Verduin

Species: bream, crappie

Remarks:

The name of Mike's fly comes from his first encounter with a crappie jig similiar to the fly. He saw several of these mounted on the cap of another angler during a fishing contest. He was so impressed with the lure that he modified it to make it "fly friendly".

Fish the fly with a long leader, or if necessary, with a sink tip connector. Make tiny strips to drag it along the bottom, then hold on because whatever eats it usually isn't small. Because the jig head allows the hook to ride up, it's one of the best flies ever created for fishing bottom nesters, like redears and oscars.

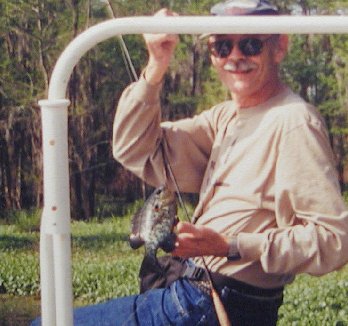
Incidently, that's Mike himself with a one-pound redear caught at Lake Concordia using the "Cap".

Materials:

Hook: 1/100 or 1/124 ounce jig hook. A few come painted black, otherwise use black nail polish.
Legs: Barred Sillilegs or rubber legs
Body: Vernille or ultra chenille in chartreuse, black, olive, or your favorite color
Thread: using a flat waxed thread will lock the legs better than 6/0 thread

Instructions:

1. Wrap the hook shank with thread and wrap the vernille around the hook shank. Tie the vernille off at the head.
2. Attach four or six short sections of silli or rubber legs behind the head. Use a figure 8 wraps between the legs to spread them out.
3. Whip finish and cement.


Saturday, January 22, 2000

Foil Pencil Popper

Originator: Walt Holman

Variation: Paul Barnett

Species: saltwater and warmwater

Remarks:

The foil popper was popularized by Walt Holman of Alabama. Over the years, variations by Jim Freres of Texas, and Kirk Dietrich and Paul Barnett of Louisiana, have been showcased at Federation of Fly Fishers events and other fly tying exhibitions. When a foil balsa popper is constructed to fine detail, it ranks as one of the most beautiful flies to behold. Little wonder that so many end up in shadow boxes.

Fortunately, fish don't care how good your pencil poppers look. So no matter how imperfect they seem, give 'em a try. Bass, specks, pickeral, redfish, ladyfish ... all love poppers. For freshwater, use the bronze 9674 hook. For saltwater, the popular hook used to be the Mustad 9674B stainless before it was discontinued. Any 4X stainless hook should work.

Materials:

- Mustad 34011 stainless hook, size 2.
- white fishhair
- chartreuse fishhair
- green fishhair
- white chenille
- peacock or holographic crystal flash
- peel off, prismatic eyes
- 40 lb. monofilament or V-rib or larva-lace
- 20 gauge lead wire
- red thread
- white thread

Instructions (courtesy of Paul Barnett):

1. Cut 5/16" OD Balsa Plug. Use 5/16" I.D. thin wall brass tubing (sharpened edges) chucked in drill press or drill to cut plugs from balsa blocks.

2. Taper plug in pencil sharpener. Turn crank approx. 3 turns forward and 3 turns backwards – backward turns smooth cut out.

3. Cut slot for hook and cut angle on front using hacksaw blade. The hook I use most often is the Mustad 9674. #1 hook = 1 9/16" OAL. #2 hook = 1 5/16" OAL. #4 hook = 1 1/8" OAL.

4. Sand cup in face of plug. Face can be also be left flat or cut at a downward (opposite) angle to make a diving plug.

5. Glue in hook and filler. Use Devcon 2 ton epoxy for glue filler. A 1/16" x 1/8" balsa strip serves best as filler.

6. Cut excess of filler and sand taper on rear. 240-280 grit sand paper works best.

7. Glue on foil with rubber cement and roll knurled punch over body for scale look. Punch with a 1/4" or 5/16" OD knurled finish works best.

8. Pain back, cup, and eyes. Use a sponge or eyebrush with black or dark paint to create a top finish. Use an orange or red paint for the cup face and gills. Use 3 different size dowels to paint the eyes. A red-white-black eye pattern is most used. The best paint for this job is acrylic enamel (easy to work with and binds to the epoxy finish).

9. Tie on tail and coat with Devcon 2 ton epoxy. Thin epoxy approx. 20% with acetone & add ultra fine glitter for a great look. Rotate poppers until epoxy is dry enough not to sag – usually 1 to 2 hours depending on how much acetone was added.

Balsa blocks, balsa strips, brass tubing, rubber cement – all can be found at Hobby Lobby or Hobby Town. Your local hardware store, Home Depot, Lowes, Sears – you can find hacksaw blades, knurled punches, Devcon epoxy. For colored foil, the best type is that used for baking potatoes.

Alternative to drill press: a 2" brass tubing with a hole at the top for an allen wrench. The tubing is twisted into the balsa – make sure the plug is with the grain of the wood! The pencil you see is used to push the plug out the tubing. The foil in the case has been pre-cut to sizes for a size 1 popper. Making foil poppers is not time consuming …if you utilize an assembly line approach!

Friday, January 21, 2000

Rosborough Hares Ear

Originator: James Ogden

Version: Polly Rosborough

Species: freshwater

Remarks by Catch Cormier:

The original Hares Ear is one of the oldest flies known, attributed to 19th century English tier James Odgen, but likely many decades older. This version of the classic nymph was by Polly Rosborough, author of the book "The Fuzzy Nymphs".  Rosborough was a proponent of flies that are suggestive in nature and which have a soft, buggy profile that displays motion even in still waters.

I saw this fly - minus the beadhead - tied by Rosborough at the 1993 Federation of Fly Fishers National Conclave in Livingston, Montana.  In addition to being the first to add a "gold rib" to the hare's ear fly, Rosborough used a dubbing loop of fibers from the mask of the rabbit to make an especially buggy thorax.  I later added a bead head, which at the time, was still fairly new to flies here in America.  It eliminated the need for adding lead wire to give weight.  The fibers of the tail, along with the spun fibers of the thorax, add subtle motion to this fly that is especially effective in enticing fish. While it's a great trout fly, it's even better for redear sunfish (chiquapin), bluegill, and Rio Grande Perch.  

Materials:

  •  Hook: 2XL nymph, size 14
  •  Bead: small (5/64)
  •  Thread: size 6/0 or 70 denier
  •  Tail: Hare's Mask, short hairs found on the lower ear
  •  Abdomen: Mixture of hare's mask fur and antron
  •  Ribbing: small copper wire
  •  Thorax: Longer hare's mask fibers found on sides of face
  •  Wing Case: 4 strands of turkey fibers

Instructions:

  1. Start with thread base, then tie in bead head building up a thread ball behind the bead to secure it in place.
  2. Tie in tail fibers
  3. Tie in copper wire
  4. Get several clumps of hares mask and antron and blend it together with your fingers. Touch the fibers to the waxed thread and form a noodle of dubbing. Wrap the dubbing toward the hook bend. Then wrap thread back toward the eye.
  5. Spiral the copper wire thru the abdomen by wrapping opposite the dubbing wraps.
  6. Cut off turkey feather section. Bind in at thorax going towards tail.
  7. Form a dubbing loop at rear end of the thorax about 3-4" long and add long fibers. Tighten the dubbing loop by spinning with a dubbing spinner or with an electrical test clip. When tightened, palmer the loop around the thorax area.
  8. Once the thorax is formed, pull the turkey wing fibers forward and bind down with thread behind bead head. Then whip finish.
  9. Take a small brush and gently abrade the bottom and sides of the thorax to give the fly a buggy appearance.